How Solar Panels Are Installed: Step by Step Details
The most commonplace for the installation of solar panels is the roof, if installed on the roof is not applicable or desired, the solar panels could also be mounted on the ground.
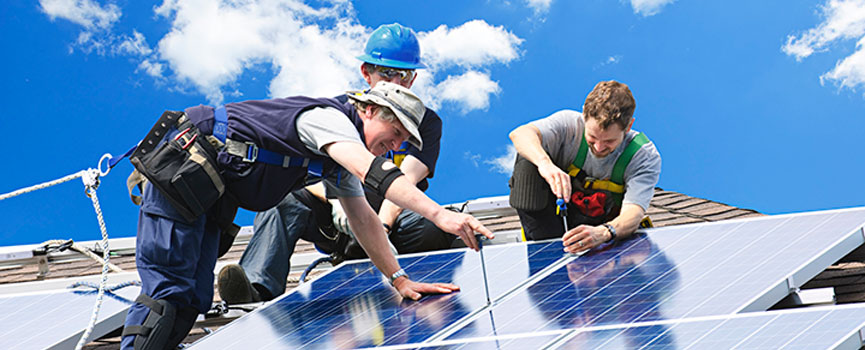
When dealing with large projects, you should hire experts to install the panels. Here you will learn how solar panels are installed. We've laid out a simple seven-step guide for the typical solar installation process.
Things to Do Before Solar Panel Installation
Cost Calculation
The first step is to calculate the cost involved in setting up the type and size of the system. Remember that governments of Different Countries around the world offer subsidy to encourage Solar Panel Installation and use of Renewable Energy. This subsidy is different in different countries. For e.g. Subsidy offered by USA is different from Subsidy in India or China.
Equipment Needed
Second step is to make a checklist of the equipment needed for a solar energy system: Solar Panels, Charge Controller, Power Inverter, and Battery.
Size of the System
The next step is to determine the size of the solar system required. You should add up wattage of all the electrical appliances that you plan to use. Calculate how many hours per day the appliances will be used.
If you follow the above steps, you will be able to know the wattage requirement, size of the solar battery needed and the wire size. Remember that correct wire size will prevent overheating of the wires and ensure maximum transfer of power to your batteries.
How Solar Panels Are Installed
Step 1: Find the Best Location
First, you should survey your property to identify the best place to install the panels.
Remember, just because the sun hits an area of your rooftop or property doesn't mean it's the best spot. The pitch and direction of the roof affect the efficiency of the solar modules.
Therefore, make sure you pick a location that will give the panels maximum exposure to the sun for most of the day.
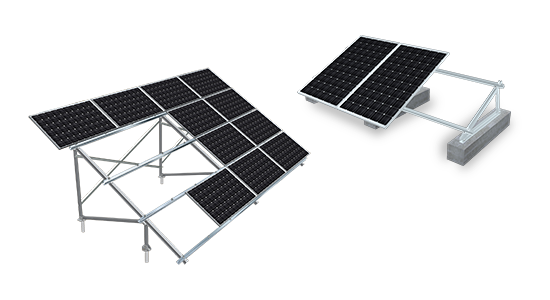
Step 2: Build the Platform
Step two involves preparing the area for the placing of the modules. You can construct the platform using metal or aluminum rails.
Design the mounting system with the length and width of the panels in mind. Make sure it is strong enough so that it can withstand extreme weather.
Building a platform requires that you run conduits from the point of installation to inside the house, where the generated power will be processed.
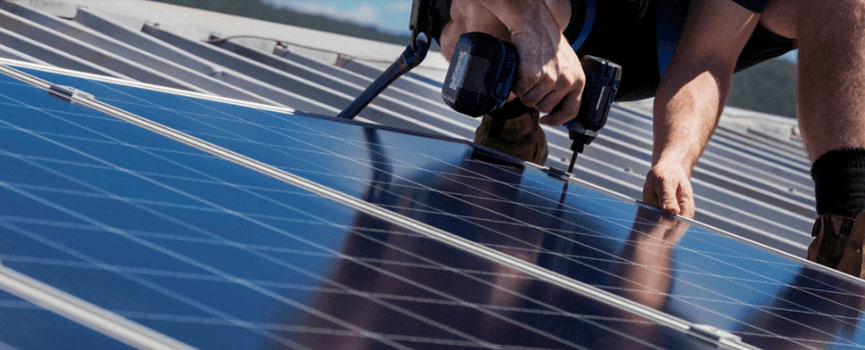
Step 3: Mount the Panels
The panels are mounted on the platform using PV brackets, bolts, or clamps.
The role of the accessories is to ensure that the modules are held firmly on the platform.
Be careful when installing panels on the roof to avoid accidents and damages.
Step 4: Wiring
You will need to wire the solar modules together using junction connectors or a fuse combiner box. Make sure that the cables are well insulated to avoid power leakage and accidents. Once complete, connect the exterior wiring with the interior control panels.
The connection will allow energy to flow from the disconnect to a charge controller and battery bank for storage. Alternatively, it can flow from the disconnect to an inverter. Whether power will first flow into the charge controller or the inverter will depend on the type of solar power system in place.
The wiring stage is crucial. That is why you should not carry out solar panels installation if you are not a qualified technician. Instead, hire professionals who have experience with wiring to avoid injury or damage to the system.
Step 5: Ground the Panels and the Mounting System
Earthing the solar panels and the mounting system is crucial in the installation of panels. It will:
● Protect you and others from electric shock, which can be fatal
● Offer protection against fire that can be caused by the system
● Protect solar component against lightning since it causes a power surge
That is why you need to make sure the installation has grounding rods that should remain six inches above the ground.
The mounting system consists of metal, and that why it should be earthed. The control panel inside the house must also be grounded if there is no earthing network already in place.
Step 6: Connect the Electrical Components
The next step is to connect the electrical components properly. Since the wiring, determined by the type of solar system is already in place, fitting the parts should not be a challenge.
If the system has a battery backup, the number of components will be many. In this case, make sure connections between the panels, charge controller, battery, and the inverter are all correct. You can then direct the power from the inverter to the main electrical control panel of the house.
Step 7: Start and Test Solar Panels
The final step is to switch the power on and test the newly installed solar panel system. After that, the solar panel installation process is completed. Start enjoying the benefits of solar photovoltaic power.
Some of the main advantages of installing solar panels

1. It reduces your electricity bill
2. It is making you more environment-friendly
3. It needs little to no maintenance at all
4. It increases the sustainability of energy
5. It is safer than the energy current today
6. It gives you tax credits, rebates, and other benefits
With these benefits, it is not difficult to see why solar panels are slowly becoming the mainstream source of energy for most homes. Big and small companies alike and even residential areas are gradually converting to this energy source. Despite the initial installation cost being quite expensive, the benefits, in the long run, outweigh this expense.
Conclusion
These seven steps represent the basics of how solar panels are installed. But of course, these are just general guidelines, if it is a large project, make sure that you hire qualified technicians for the solar system.