5 Things You Need to Know about Tile Roof Solar Mounts

Tile roofs are aesthetically pleasing and offer robust protection for your home. When you decide to install solar panels, several factors influence the specific design and expense of your solar setup. Different roof styles necessitate varied installation methods. Here are some important considerations you should be aware of before you attach solar mounts to your tile roof.
Types of Tile Roof Mounting Systems
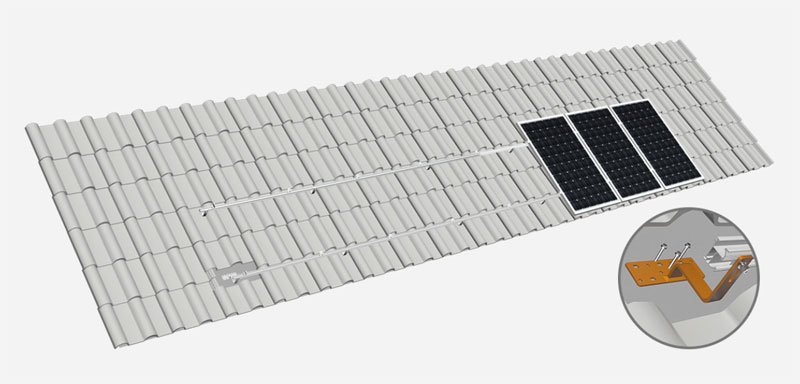
Tile Hooks
Hook mounts provide a common solution for attaching solar panels to tile roofs due to their simple installation and adaptability to various tile sizes and shapes. You secure them to the roof with screws or bolts, and then fasten the solar panels to the hooks using clamps or brackets. This method allows for installation without puncturing the tiles, thus preserving the roof's integrity.
A key benefit of hook mounts is their adjustability, enabling them to accommodate different tile dimensions and forms, making them a versatile option for diverse roof styles. Additionally, these mounts are typically constructed from robust materials like aluminum or stainless steel, ensuring resilience against harsh weather and longevity.
Tile Replacement Mounts
Tile replacement mounts offer another approach, where you replace a single roof tile with a mount that provides a secure anchor point for the solar panel. The installation process mirrors that of a regular tile, but the mount incorporates a bracket or rail for attaching the solar panel. This type of system proves ideal for roofs with curved or irregularly shaped tiles that pose challenges for other mounting methods.
The primary benefit of tile replacement mounts lies in their ability to blend seamlessly with the existing roofing. As these mounts substitute for an actual tile, they avoid the need for additional roof alterations, reducing the likelihood of roof damage and resulting in a neat, professional installation.
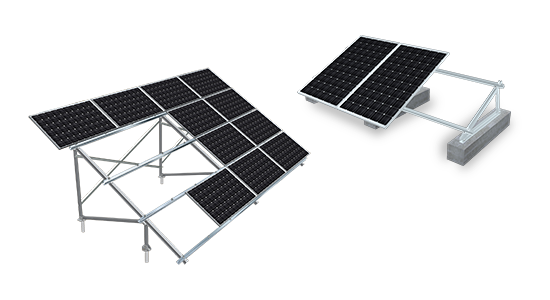
Tile Anchor Mounts
Tile anchor mounts offer a versatile choice for mounting systems on tile roofs, accommodating a broad spectrum of tile sizes and styles. You secure the mounts to the roof using screws or bolts, and then attach the solar panels to the mounts using clamps or brackets. This system is particularly well-suited for roofs with flat or low-profile tiles that may not be suitable for other mounting options.
The versatility of tile anchor mounts stands out as their main advantage. Similar to other options, these mounts are usually made from durable materials like aluminum or stainless steel, ensuring they can withstand harsh weather conditions and provide long-lasting performance.
Mounting Bracket Kit
1. Flashing: This is a critical component that creates a watertight seal around the penetration points where the mounting system attaches to the roof. It prevents water from seeping under the tiles and causing leaks.
2. Base Mounts: These are the anchors that secure the system to the roof. Different types of base mounts are available depending on the specific tile and roof structure. Common options include:
● Tile hooks: These hooks grab onto the tiles themselves and are often used with flat or S-shaped tiles.
● Standoff mounts: These mounts are secured to the roof deck, creating a raised platform for the rails. They are typically used with curved tiles or when additional clearance is needed.
3. Rails: These horizontal beams run the length of the solar array and provide a mounting platform for the solar panels. Rails are typically made of aluminum for strength and corrosion resistance.
4. Clamps: These components attach the solar panels to the rails, ensuring they are secure and properly aligned. Different clamp types are available for various panel thicknesses and frame designs.
Installation Process
1. Layout design: The installer will assess the roof and determine the optimal layout for the solar panels, taking into account factors like shading, roof orientation, and available space.
2. Tile removal: Specific tiles are carefully removed to access the roof deck and install the base mounts.
3. Flashing installation: Flashing is placed around each penetration point to ensure a watertight seal.
4. Base mount installation: Install the suitable base mounts, such as hooks, onto the roof deck.
5. Rail assembly: Rails are attached to the base mounts, creating the foundation for the solar panels.
6. Panel mounting: Clamps are used to secure the solar panels to the rails in the designated layout.
7. Electrical wiring: The installer connects the panels to the inverter and the rest of the electrical system.
8. Final inspection: The entire system is thoroughly inspected to ensure proper installation and functionality.
Factors to Consider When Choosing Tile Roof Mounting Systems
When selecting a tile roof mounting system, you should carefully evaluate several key factors to guarantee a safe and secure installation.
1. Compatibility and Types of Tiles
Tile roof PV mounts must be compatible with the specific type of tiles on your roof, whether they are clay, concrete, or slate. Different tile shapes and materials require different mounting solutions to ensure secure attachment without causing damage to the tiles.
2. Waterproofing and Protection
One of the key challenges with installing PV systems on tile roofs is ensuring that the installation does not compromise the roof's waterproof integrity. Special flashing and mounts are used to maintain the waterproof barrier while securely anchoring the panels to the roof structure.
3. Roof Pitch and Orientation
The angle and direction of your roof play a significant role in determining the appropriate mounting system. Steeply pitched roofs necessitate different mounting solutions compared to those with a gentle slope. Also, the way your roof faces—whether north, south, or another direction—affects how effectively your solar panels will perform. Therefore, it's vital to select a mounting system that allows for the most advantageous positioning of your panels.
4. Weight Capacity
Tile roofs are generally heavier than other roofing materials. Adding the weight of PV panels and their racking systems requires a careful assessment of the roof structure's ability to support additional loads. It may be necessary to reinforce the roof or adjust the layout of the panels to distribute the weight evenly.
5. Wind and Weather Conditions
The local wind and weather patterns where you reside can affect the safety and stability of your tile roof mounting system. When selecting a system, ensure it is built to endure the specific wind and weather conditions of your region. Consider incorporating additional bracing or reinforcement if needed to enhance the system's stability.
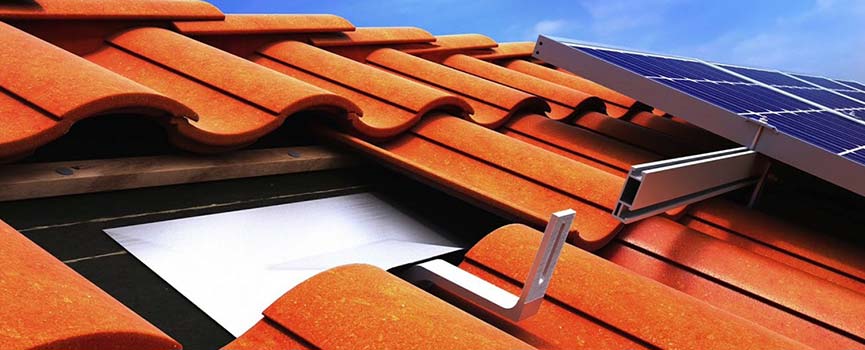
Choosing Inset Solar Installation for Lightweight Tile Roofs
Installing solar panels on clay tile or concrete tile roofs is achievable through a process called "inset" or "comp-out" installation. While slightly more complex than installations on other roofing materials, the process is straightforward and commonly employed.
Instead of drilling directly into the tiles, a roofing professional will remove existing tiles from the installation area and replace them with composite shingles. To ensure a watertight seal, transitions are reinforced with metal flashing. Finally, the solar panels are installed onto the composite shingles, and the surrounding area is filled with the original clay or concrete tiles, maintaining the roof's aesthetic appearance.
What can Mibet do?
Our tile roof solar mounting system provides an ideal solution for installing on tile roofs. It features key stainless steel roof hooks that are compatible with almost all types of roof coverings, including pantile, plain tiles, and slate tiles. This system meets Australian and other international standards for wind and snow load, ensuring it is adaptable to a diverse range of climatic conditions. It is an excellent choice for both residential and commercial projects.